
The Specimen Determines the Lens
Choosing a lens for a specimen is not about selecting the highest available magnification.
Start thinking about your imaging brief with two questions: how much of the subject must be visible, and what is the smallest feature the finished image must allow the observer to distinguish?
The answer will depend on many factors: working distance, subject relief, holder clearance, lighting, measurement requirements, and the amount of capture and processing data the project can support. A lens choice that records more detail than the project can use may add photographs, processing time, storage, and complexity without improving the result.
Start with coverage and required detail
This comparison covers three lens families for Magnify2. The Laowa Aksen 1-5X replaces the discontinued Canon MP-E 65mm, which covered the same magnification range. Start with the useful magnification range, then calculate sampling and field of view for the camera body and complete optical configuration.
| Lens family | Typical magnification range | Useful starting point | Main constraint |
|---|---|---|---|
| Canon 100mm Macro | 0.25X to 1X | Wider coverage with macro detail. Good for large-area coverage. | Limited to 1:1 magnification. |
| Laowa Aksen 45mm f/2.8 1-5X Ultra Macro APO | 1X to 5X | Flexible macro work across several magnifications. | Two lenses for max magnification. |
| Nikon Toolmakers telecentric objectives | 1X, 3X, 5X and 10X | Mosaics and dimensional workflows where reduced perspective variation matters. | Fixed magnifications, decreasing field of view, and less working distance at higher magnification. |
Sampling by camera
Today we would typically use a Canon R-series mirrorless camera such as the R10 or R5 Mark II. The table below shows nominal object-plane sampling calculated from each camera’s published sensor width and horizontal pixel count, divided by optical magnification.
| Magnification | Canon R10, microns per pixel |
Canon R5 Mark II, microns per pixel |
|---|---|---|
| 0.25X | 14.87 | 17.58 |
| 0.5X | 7.43 | 8.79 |
| 1X | 3.72 | 4.39 |
| 3X | 1.24 | 1.46 |
| 5X | 0.743 | 0.879 |
| 10X | 0.372 | 0.439 |
| 20X | 0.186 | 0.220 |
Sampling is not the same as resolvable detail; our article on defining the need before setting the resolution explains the thought process. At 1X, the nominal field of view is approximately the size of the sensor: 22.3 by 14.9 mm for the R10 and 36 by 24 mm for the R5 Mark II. The R10 therefore samples more finely at the same nominal magnification, while the R5 Mark II covers a larger area.
These are sampling distances, not guaranteed optical resolving power or measurement accuracy. Lens performance, aperture, diffraction, focus, camera setup, and image processing also affect the result.
If adapters or other elements in the optical path change effective magnification, a measured calibration of the complete system takes precedence over this nominal calculation.
More magnification means more photos
A 1X to 5X macro lens such as the Laowa Aksen illustrates the tradeoff. Moving from 1X to 5X changes nominal sampling from 3.72 to 0.743 microns per pixel on the R10, or from 4.39 to 0.879 on the R5 Mark II. It also reduces the physical area recorded in each frame. Covering the same specimen will therefore require more positions, more photographs, more processing, and more storage.
Maple Leaf Canada 150 is a documented historical example. The 2017 GIGAmacro Viewer record identifies the now-discontinued combination of a Canon T6i, Canon MP-E 65mm lens, at 2X magnification. The finished 5.31 gigapixel image measures 79,896 by 66,428 pixels and was assembled from 5,544 photographs in 22 rows, 18 columns, and 14 focus positions. It shows one workable balance between broad subject context and fine surface detail.
Working distance can rule out a lens
Magnification is only one part of the equation, working distance can also be critical for specimens with a lot of dimensionality. Our Toolmakers specifications list working distances of 79 mm at 1X, down to 48 mm at 10X.
A specimen with substantial height, surrounding hardware, a restrictive holder, or lighting that must fit close to the subject may need more clearance than the selected magnification provides. In that case, the lens with the greater working distance may be the practical choice, with some sacrifice in magnification.
Measurement requires a complete method
For dimensional work, we recommend Nikon Toolmakers telecentric objectives. Their optical geometry reduces perspective variation and supports consistent mosaicing resulting in better stacking and stitching. A dimensional workflow still needs a valid image scale, a documented calibration method, controlled specimen position, and a clear statement of the required accuracy. The lens, camera, magnification, stage, subject position, calibration reference, software, and measurement procedure must all be evaluated to determine the optimum configuration.
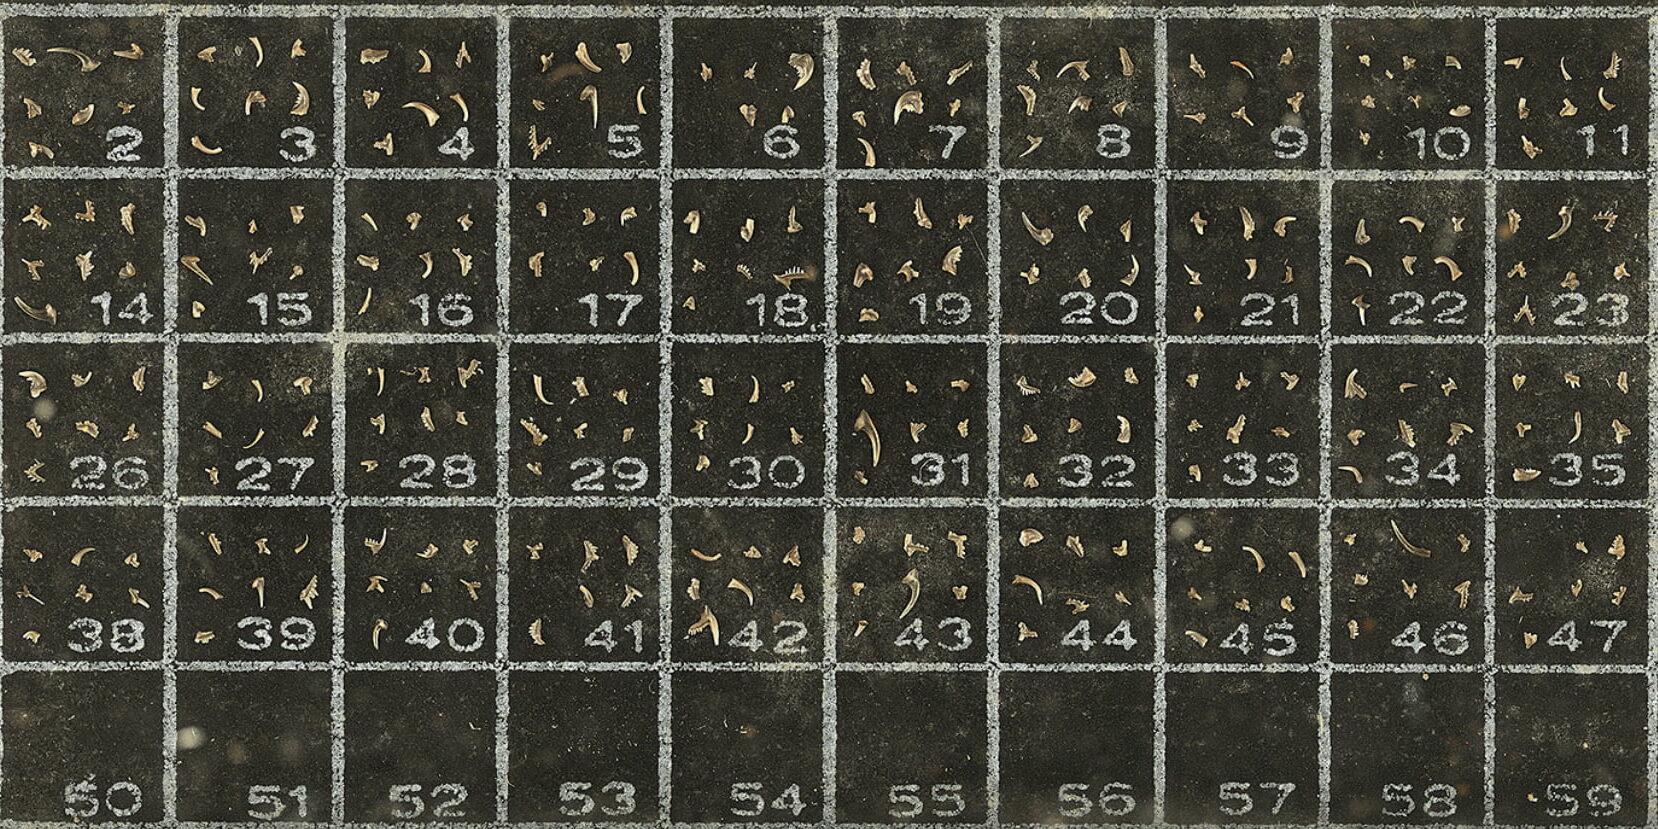
Microfossil Slide provides a second example. Its GIGAmacro Viewer record credits Gary Motz (then of Indiana University) as the subject source, and states that the image was captured on Magnify2 with a Nikon 5X telecentric lens. The finished 1.18 gigapixel image measures 53,255 by 22,075 pixels and was assembled from 7,140 photographs in 10 rows, 14 columns, and 51 focus positions.
Include lighting and support in the lens decision
Lens selection cannot be separated from the way the subject is held and illuminated. Slides, radiographs, semi-translucent parts, and subjects intended to appear on an illuminated background require transmitted lighting. Reflective subjects may need diffusion or cross polarization. High-relief subjects may require additional working distance, support, or focus positions.
Test the proposed lens, lighting, support, and camera configuration on a representative part of the actual subject before committing to a long capture.
Write the lens brief before setting up
Before choosing the lens, consider and record:
- The subject area that must remain visible.
- The smallest feature that must be distinguished.
- The subject’s height, relief, orientation, and stability.
- Required working distance and holder clearance.
- Lighting and surface behavior.
- Whether the result is for visual examination, comparison, documentation, or calibrated measurement.
- The acceptable photograph count, capture time, processing demand, and storage volume.
- The camera body and optical configuration used to calculate field of view and sampling.
The best lens is the one that captures the required evidence with enough context, clarity, and repeatability, without generating detail or data that the project cannot use.
What is the smallest feature you need to distinguish, and how much of the subject must remain visible around it?

Graham has worked as a business and marketing leader in high technology, aviation and not-for-profit large and small organizations.
He jumped out of corporate life in 2007 to ‘have more fun’ and does so helping small companies with strategy, business, and marketing as well as traveling and making pictures.
He loves working with smart groups of people to solve challenging problems.
Gadgets of all sorts (especially anything to do with aviation and flight) and photography have fascinated since early childhood. He is also an accomplished photographer who exhibits regularly and a former competition aerobatic pilot.
Graham is a transplanted Brit (hence the humo(u)r) who moved to CA in 1996. Now in Oregon via North Carolina (grandchild chasing)
He is a retired Fellow of the Chartered Institute of Marketing and a Chartered Marketer.
You can find him on LinkedIn please connect with him there.